(SERIOUSLY) UPDATED
My own best sourdough recipe has undergone some changes recently. I thought perhaps there were enough sourdough recipes on the internet already, so I could remove this post. However, it turns out to be a fairly popular one, so I’m going to update it (not sure if the popular bit is actually the recipe, maybe it’s the blah, blah, blah at the beginning). The initial parts of this post remain mostly the same, the science, the equipment, the starter. But the recipe doesn’t.
According to Dr. Google, there are 82,900,000 entries for sourdough on the internet. Here’s my contribution to that impressive list.
Making sourdough bread can be very satisfying. Even while you are falling asleep the night before you make the bread, with your levain ripening in the kitchen, you’re thinking, those little yeasts and lactobacilli are working away down there and in the morning we’ll all get together and make a really satisfying loaf of bread. I’ve done a little research, which I will describe; but for the definitive treatise you can buy a copy of Nathan Myhrvold’s epic series ‘Modernist Bread’. It’s 2,642 pages of deep study and gorgeous photography about bread, and sourdough enjoys a goodly share of that space.
Myrvold came to Microsoft when it purchased his own tech company in 1986, and he became Microsoft’s first Chief Technology Officer, my old job. In 1995 he left to devote himself to other projects, including photography and food. ‘Modernist Bread’ is one of the outcomes. It clocks in at 5 volumes, current price around 500 US$ on Amazon. The one-volume ‘Modernist Bread at Home’ is a only about $80. You should know that Myhrvold holds a culinary diploma from ´Ecole de Cuisine La Varenne’ in France. He has also won the James Beard Foundation Award. Anyway, enough about Myhrvold.
Basics
One of the appealing things about sourdough bread (you can also make pancakes, biscuits, and even chocolate cake with sourdough starter) is that it contains only 4 ingredients: water, salt, flour and starter. Like the blues, a very simple foundation which can give rise to a lot of variety. Calling the starter a single ingredient, of course, is a deception (as is calling the blues ‘simple’). The starter, basically just a smaller sourdough, contains yeast, which will provide the leavening for the dough, and usually several kinds of lactic acid bacteria, ‘lactobacilli’, which will convert sugar to lactic acid and other trace ingredients that give the bread its tangy sour taste.
As to which yeast and which lactobacilli . . . ah, there’s the rub. Each person’s starter may differ from most others, and yours will probably change over time. The only microbiological analysis that matters is the taste of the bread that comes out of the oven. The engaging feature of the sourdough starter is that it will probably contain lactobacilli derived from the skin of the person who made the original starter. And manipulating the dough with your hands, as suggested below, will further ‘contaminate’ it with bacteria derived from you. Each loaf unique, bearing a history.
So the process is, mix sourdough starter with flour, salt and water. Watch it ferment and expand. At some critical juncture pop it into the oven. Then take it out and face a great temptation, to which the only correct response is, do not cut into the loaf for at least an hour.
The Science
Flour contains starch, a polymerized form of glucose, which the wheat plant (or other grain) lays down in the endosperm of the wheat seed. It’s there to feed the little embryo that’s also in the seed, which will produce the next generation (unless its growth is interrupted to yield sprouted flour, currently a thing). The starch needs to be broken down to the simple sugar glucose, which is what the yeast and lactobacilli will consume.
Flour itself contains enzymes that break down starch to maltose when it is soaked in water. Maltose consists of two glucose molecules linked together. Yeast secretes an enzyme that cleaves maltose to glucose, which is the fuel for the microorganisms.
Both the yeast and the lactobacilli consume glucose by a common pathway, called glycolysis, in which the sugar glucose is converted by a sequence of metabolic steps to two molecules of pyruvate. In yeast, pyruvate is then converted, by a couple of additional steps, to ethanol and carbon dioxide (‘fermentation’). Depending on the circumstances, that can lead to the production of beer or wine. In breadmaking, the ethanol and carbon dioxide escape during fermentation or are baked off, leaving behind holes that define the bread’s ‘crumb’.
The lactobacilli (bacteria that produce lactic acid) turn pyruvate into lactate, which is also what happens in a sprinter’s muscles when she is propelling herself down the track too fast for her oxidative metabolism to catch up. (There’s lots about glycolysis elsewhere on the site.) Glycolysis, the most primitive part of energy metabolism, is essentially the same in the athlete’s muscles, or in any other of her cells, and in yeast and bacteria.
Both processes, those of the yeast, and particularly those of the lactobacilli, also produce a variety of other metabolic products, and these give the bread its individuality.
If you know something about energy metabolism, you may be puzzled that the yeast produce carbon dioxide and ethanol, rather than oxidizing all of the pyruvate to carbon dioxide, which yields a lot more energy. The answer is, we’re not sure. It’s the same thing that many cancer cells do — they are profligate in their consumption of energy supplies, secreting a product, ethanol from yeast, lactic acid from the cancer cell, that results from utilizing only a fraction of the potential energy of the original glucose. And not all yeast do this — there are some that oxidize glucose all the way to carbon dioxide, without producing alcohol. The yeast for bread making, Saccharomyces cerivisiae, carries out fermentation and ethanol production.
The Starter
You can get starter commercially, or online , or from a friend. Or, if you want to have the whole experience, you can make your own. Sourdough starter contains yeast and lactobacilli. The yeast causes most of the rise; the bacteria provide the acid, and aromatics, that characterize a sourdough. The yeast possibly comes from the flour originally used to make the starter, or, I think more likely, from the air. Some variation in sourdough yeast is known; it is said that in San Francisco, there’s a substrain of yeast called Candida Milleri that makes sourdough extra tasty. This may in fact be the principal yeast in most sourdoughs. I don’t know.
The lactobacilli, which probably originally come from the skin of the person making the starter, produce lactic acid, as they do in yogurt making. The pH goes down to about 3.8 during bread fermentation. Only some yeast can grow at this pH; this is probably why making starter takes a while — selection of yeast able to grow at low pH (relatively acidic conditions) is necessary.
In San Francisco, there are unique bacteria called Lactobacillus sanfranciscensis in at least some of the sourdoughs. I don’t know what the lactobacilli are in other places, but variation in these bacteria is probably responsible for the difference in sourdough made with different starters and in different places.
The basic science of sourdough is nicely described in Discover magazine, at:
https://www.discovermagazine.com/planet-earth/the-biology-of-sourdough
It took me quite a long time to make starter. I mixed white and whole wheat flours with enough water to make a smooth dough (equal parts water and flour: bakers refer to this as 100% hydration). I put it on top of the fridge, where it’s a little warmer than room temperature. Then I fed the culture every couple of days for three weeks. Feeding consisted of removing about half the material (into the compost, not the sink) and adding 30-50 grams of flour (any kind – the yeast didn’t seem to care) to the culture and an equal weight of water, and mixing vigorously with a knife.
In my case, small bubbles and a thin, unappealing liquid formed on top early in the three-week odyssey. This was probably because the lactobacilli were doing most of the fermenting, the yeast having not yet been selected for the ability to grow at the low pH produced by the bacteria. You’ll know when you’ve arrived — the culture can expand three or four fold overnight. In my case, the culture I eventually obtained probably only got started in the second week or so. By passaging it for several weeks it reached a stable balance between the yeast and the bacteria. In any case, it’s a vigorous little monster.
Starter should be kept in the fridge. Most online sources will tell you to feed it twice a week. In my experience, that’s not necessary — I get good results even feeding it every 14 days. To feed it, throw out most of the starter (not into the sink; that stuff turns to cement!), add 30 grams of flour and an equal weight of water, mix with a knife, and let it grow for a few hours at room temperature. When it’s going well, put it back into the fridge.
If the starter hasn’t been fed for a while it may look downhearted, but you can almost always cheer it up by feeding. If the starter, or your bread dough, stops rising, it won’t start again without feeding. It has probably run out of the sugar, or maybe it got too acidic because the lactobacilli outgrew the yeast.
Preamble
There are more methods for making sourdough than you can shake a stick at. My method is a mashup, plus some of my own tricks. There is a good description of some of the technique involved here.
Some notes
- Flour. You can use almost any flour that has enough protein – all purpose flour, or bread flour, or so-called ‘strong’ flour. But it should contain at least 13.5% protein. In Canada, all purpose white flour has this amount of protein, just like bread flour. In the US, you need to check. I think King Arthur bread flour is good. Europe – you’re on your own.
- I add some whole wheat flour for flavour. I’ve also added up to 20% dark rye flour, or 20% Red Fife. The gluten-related protein in rye is feckless with respect to forming structure in the bread, and using rye flour means that there will be less rise (smaller holes) in the final product. Adding vital wheat gluten didn’t make any difference, in my experience.
- Salt. Bread made without salt is inedible (except in Tuscany, where it is paired with salty cheese). But salt slows the growth of yeast, and so slows the rising. I’ve experimented with salt, and the amount in the recipe below gives good results.
- Temperature. Cold temperature, like salt, slows the rising. I have a ‘warm place’, which is at 73ºF (about 23ºC). If your warm place is warmer, it will go faster.
- The total elapsed time is 2-3 days. Which sounds oppressive, but really isn’t. On the first day, you work for about two 10-15 minute periods. On the second day you have to do a number of things throughout the day, which you do need to plan for. But the amount of time you actually work is modest. After Day 2, you can refrigerate the dough and bake it the next day. Or you can bake it on Day 2. If you choose to bake it on Day 3, you can do that any time, just pull it out of the fridge right before baking. Working at 73ºF (23ºC), the elapsed time on Day 2 between first mixing and preshaping the dough before putting it in the banneton is about 6-7 hours, but, as will be explained, you can’t assume the time required.
The equipment
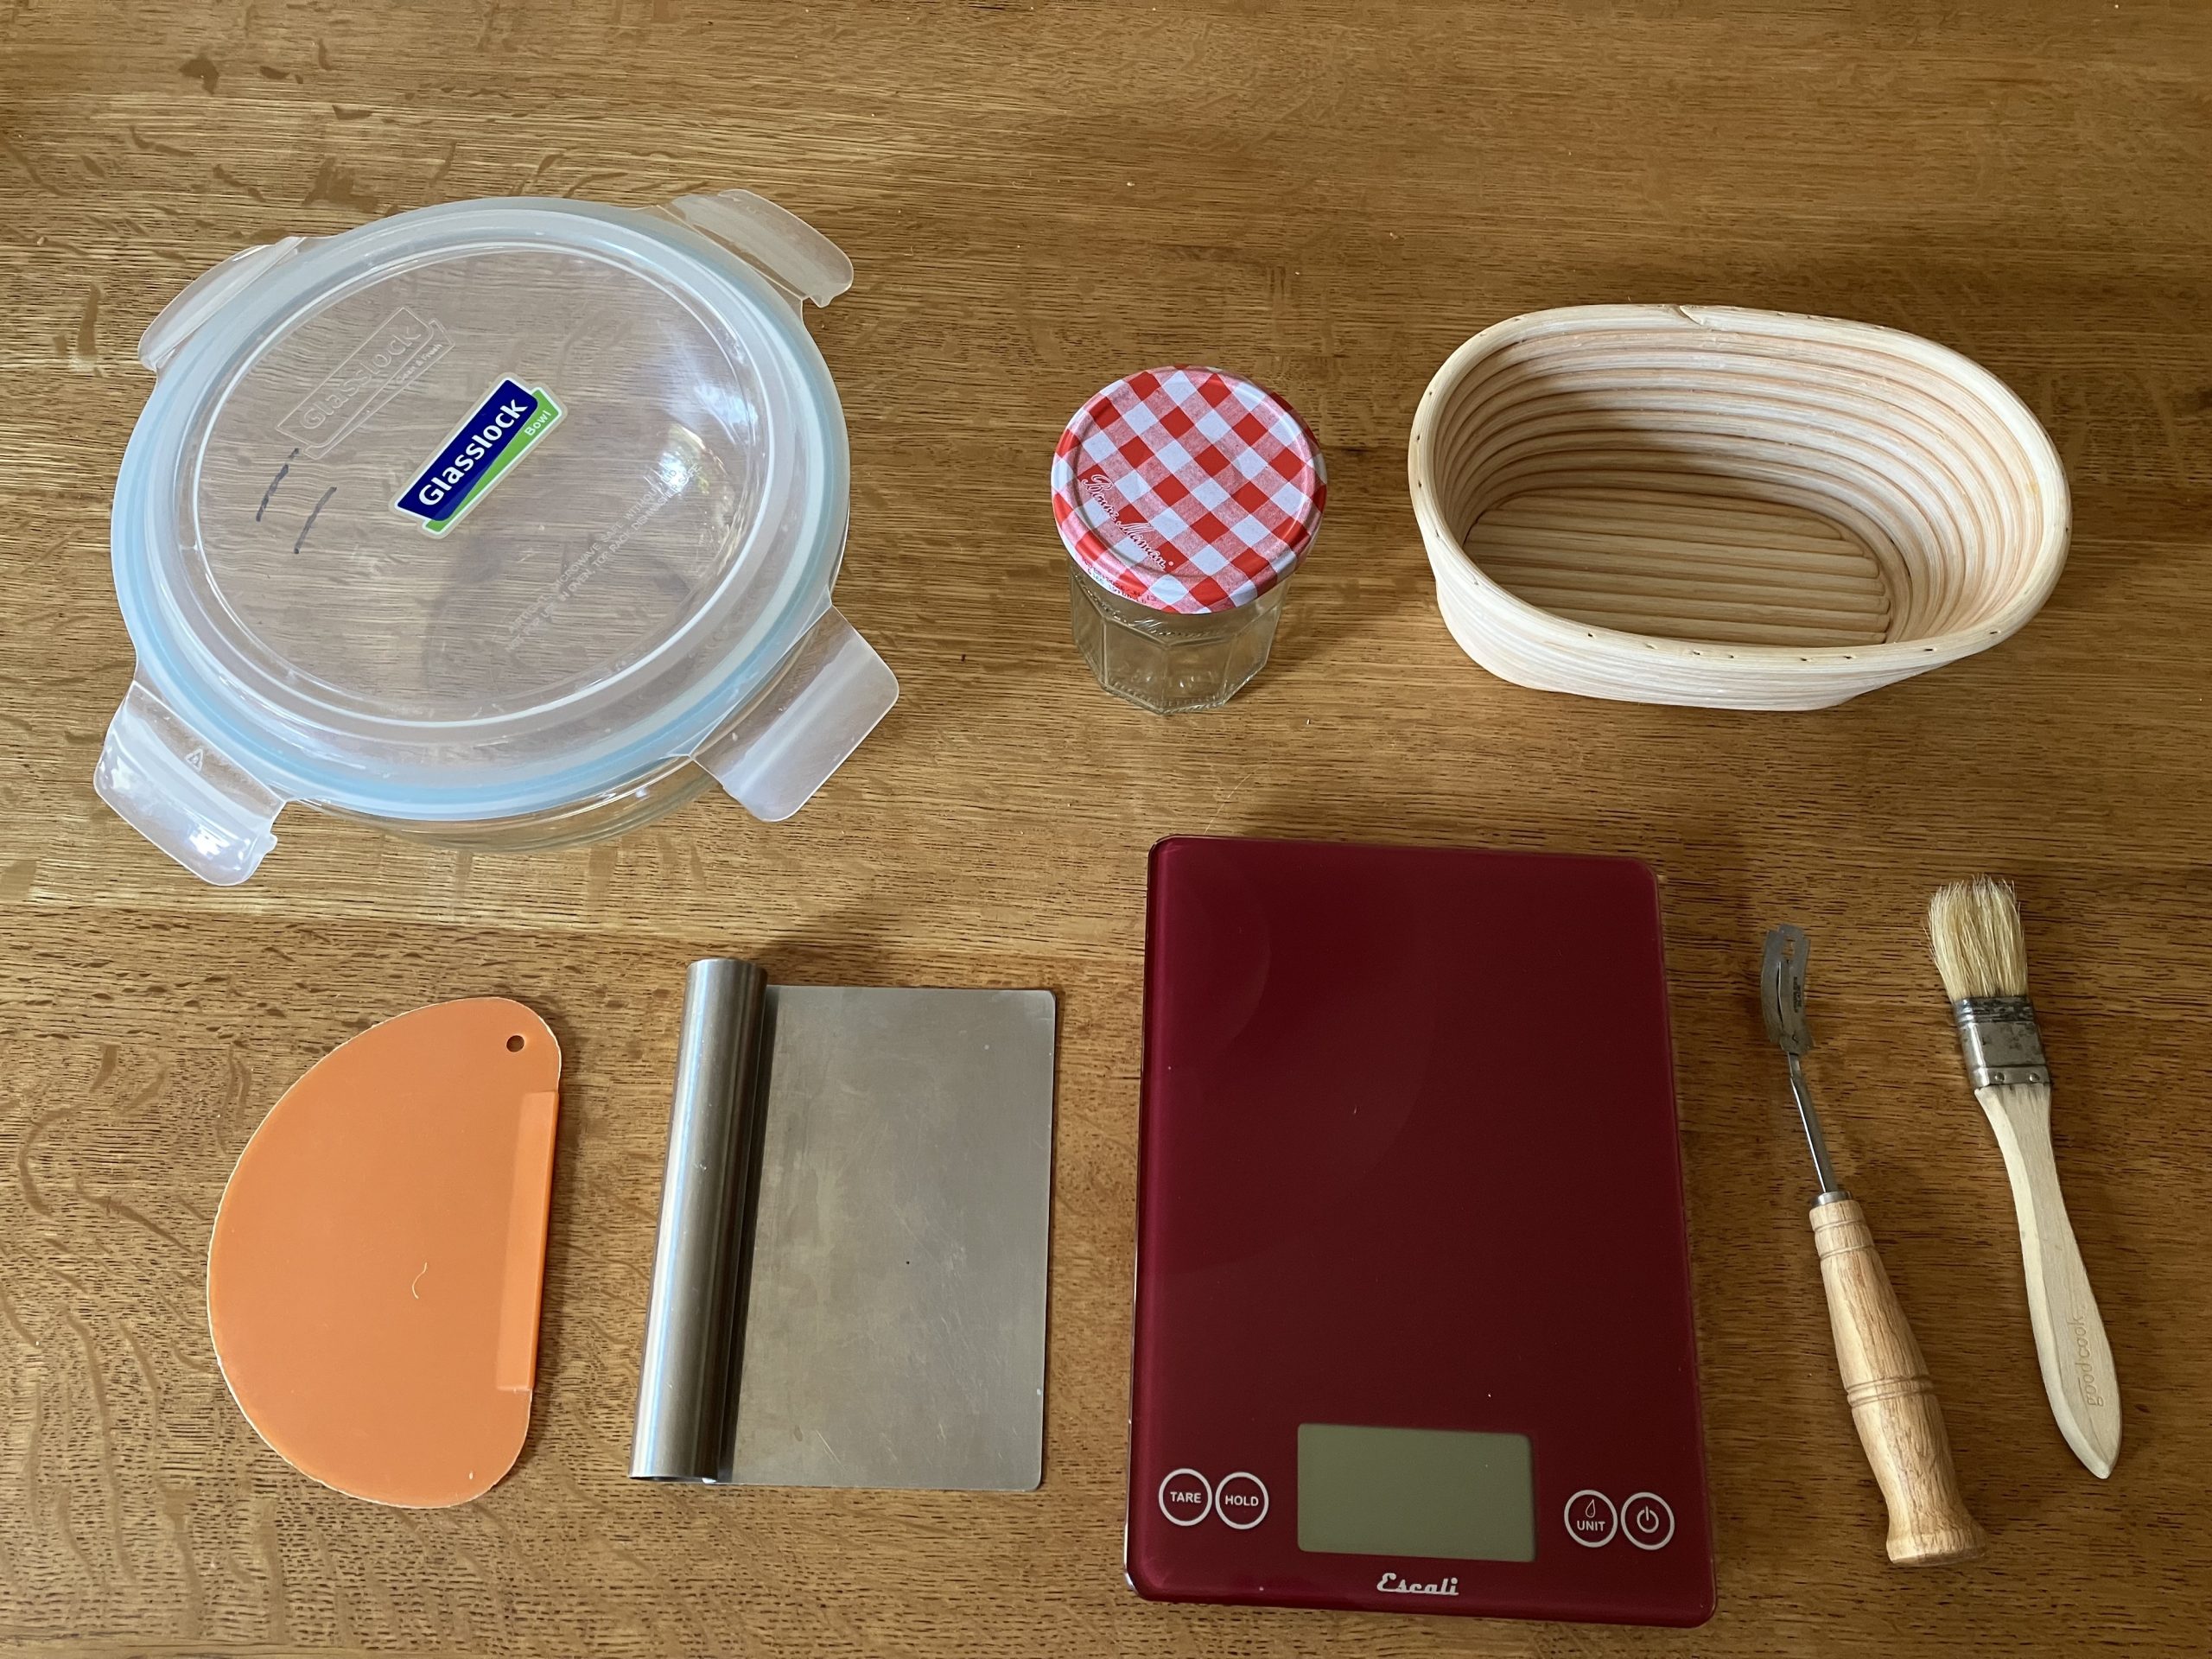
The gear. In the centre, the handy ‘Escali’ kitchen scale. Beginning on the left and going clockwise, a bowl scraper and bench scraper, and a 2 Liter bowl with cover. The ‘Bon Maman’ jam jar is perfect for keeping the starter in the fridge, or for generating the ‘working starter’. Banneton, brush for removing excess flour, and a lame (razor blade). Not shown: baking dish.
The levain
Around 2 PM on Day 1, mix 10 grams of your starter from the fridge with 45 grams of warmish water and 45 grams of white flour (whatever you are using) in a small jar. Mix thoroughly with a knife. Cover, and put this ‘working starter’ in your warm place. It should greatly increase during the day, and the top should have a convex shape. (This would be a good time to feed your fridge starter.)
Around 9 PM, add 10 grams of the ‘working starter’ to the 2 L mixing bowl, and add 45 grams of water and 45 grams of white flour and mix thoroughly. This is your levain. Cover and put it into your warm place overnight.
Making the dough
This is a 650 gram, 2o% whole wheat, 71% hydration loaf. (Hydration is measured as ‘Baker’s percentage’, which is the amount of liquid relative to the amount of flour.) The whole wheat flour increases the water requirement a little; the hydration for straight white bread can be 1 or 2% less. Optimal hydration depends on thing like the composition of the dough, and where you live. You may have to experiment to find the sweet spot. If you leave out the whole wheat, partly or entirely, you may want to use a lower hydration.
Ingredients
the levain (all of it; it contains 45 grams of white flour)
220 grams of warmish water
7 grams of salt
76 grams of whole wheat flour
254 grams of white flour (total flour is 330 grams)
On the morning of Day 2, add the water to the levain in the mixing bowl, then add salt. Stir to partly disperse the levain, which should float. Let it rest a few minutes.
While it’s resting, weigh and mix the flours. Add the flour to the water-levain mix. Mix first with a spoon, then by squeezing with your clean wet hand. Cover the bowl and put it into the warm place.
The dough is now hydrating- the flour is absorbing water and changing its consistency (as you will notice when you go back to it after an hour).
Stretch and Fold and Bulk Fermentation
After about 60 minutes, mix the dough again by hand, then carry out the first stretch-and-fold. A million sites on the internet show how it’s done. This is part of the famous ‘Tartine’ sourdough method, from San Francisco. Basically, you grab one edge of the dough, pull it up and out, then stick it back onto the doughball. Rotate 90 degrees, repeat 3 times. The dough may come out of the bowl as you try to stretch it. Let it. I like to take the dough ball out of the bowl and stretch it in all directions, fold it, and repeat, so it looks like an emerging pizza dough, and then fold it and put it back into the bowl.
Do 4-6 stretch-and-folds at 25 minute intervals. The important thing going on here is that the dough is getting ‘toughened’, less sticky, and smoothened. You should feel that happening during this process.
There’s a test for the quality of the dough at the end of the stretch-and-folds. It’s called the ‘windowpane test’, and is demonstrated on a million internet sites also; a good one is here
After the last stretch and fold, let the dough ‘bulk rise’. After some years, I now let the bulk rise go on until the dough doubles in volume. The top of the dough should now be convex (higher in the middle), the part in contact with the bowl should be lower and pulling away from the bowl, and there should be lots of bubbles. There’s also something called the finger poke test, which I have not been able to master. Now you’re ready for the next step, the ‘pre-shaping’.
Shaping and Proofing
Let the dough fall out of the glass bowl onto a dry, very lightly-floured counter top. Use a bowl scraper, the orange tool in the picture above, to loosen the edges before turning the bowl upside down. The doughball should fall out slowly.
It’s a good idea to go through two stages of ‘shaping’ the dough. There are, again, many illustrations, but a good one is here. Other people use hands to preshape the dough. I use hands and bench scraper.
After about 15 minutes, do the final shaping, following the video above, or develop your own way of getting a fat, banneton-shaped sausage.
Sprinkle copious flour on the top of the doughball, then place it into a floured banneton seam side up. (If you use a bowl to proof the dough, line it with parchment, then place the dough ball in it right side up.)
Put the banneton into a large ziplock bag and put it into the warm place. When it rises 50-60% – this may take an hour or two – put it into the fridge overnight, or bake it today. If you bake the bread on day two, it’s still a good idea to refrigerate it for a couple of hours first.
Baking
A baking dish favored by a lot of sourdough bakers is a 4L dutch oven (it must have an oven-proof handle on the lid), but you can use any ovenproof pot with a good lid. Preheat the oven, with the baking dish in it, at 425ºF for 40 minutes.
Remove the dough from the banneton by placing a large square of parchment paper over it, then inverting. The dough should fall out. Trim the parchment paper, leaving two “ears” on opposite sides for handling the dough.
If you’ve put the dough into a bowl to proof, simply remove it by the parchment paper. It’s already right side up.
Score the top of the dough about 1/2 inch deep with a lame or razor. Scoring facilitates “oven spring”. For fancy scoring, check out the Internet. The commercial lame I have curves the razor blade, and makes a better gash in the dough.
Take the hot baking dish from the oven, lower the dough ball into it using the parchment.
Cover (essential!) and bake 25 minutes at 425º. Remove the lid and continue baking until the top has a nice dark tan colour (probably 20-25 minutes).
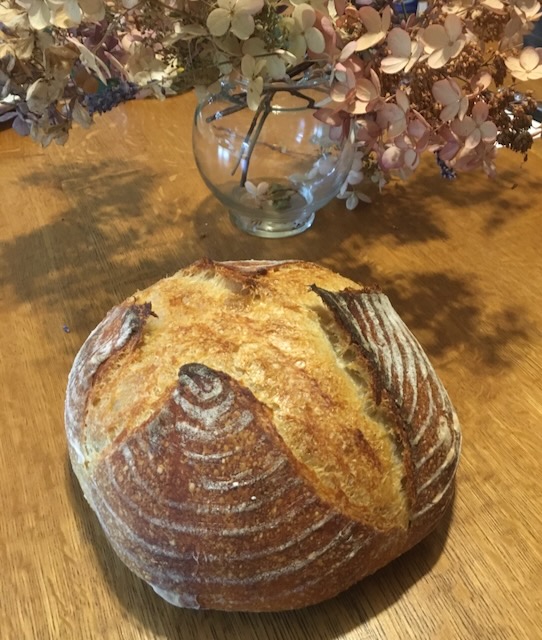
Resist the temptation to cut the bread for at least an hour after it comes out of the oven.
The finished loaf will have about 1500 Calories.

